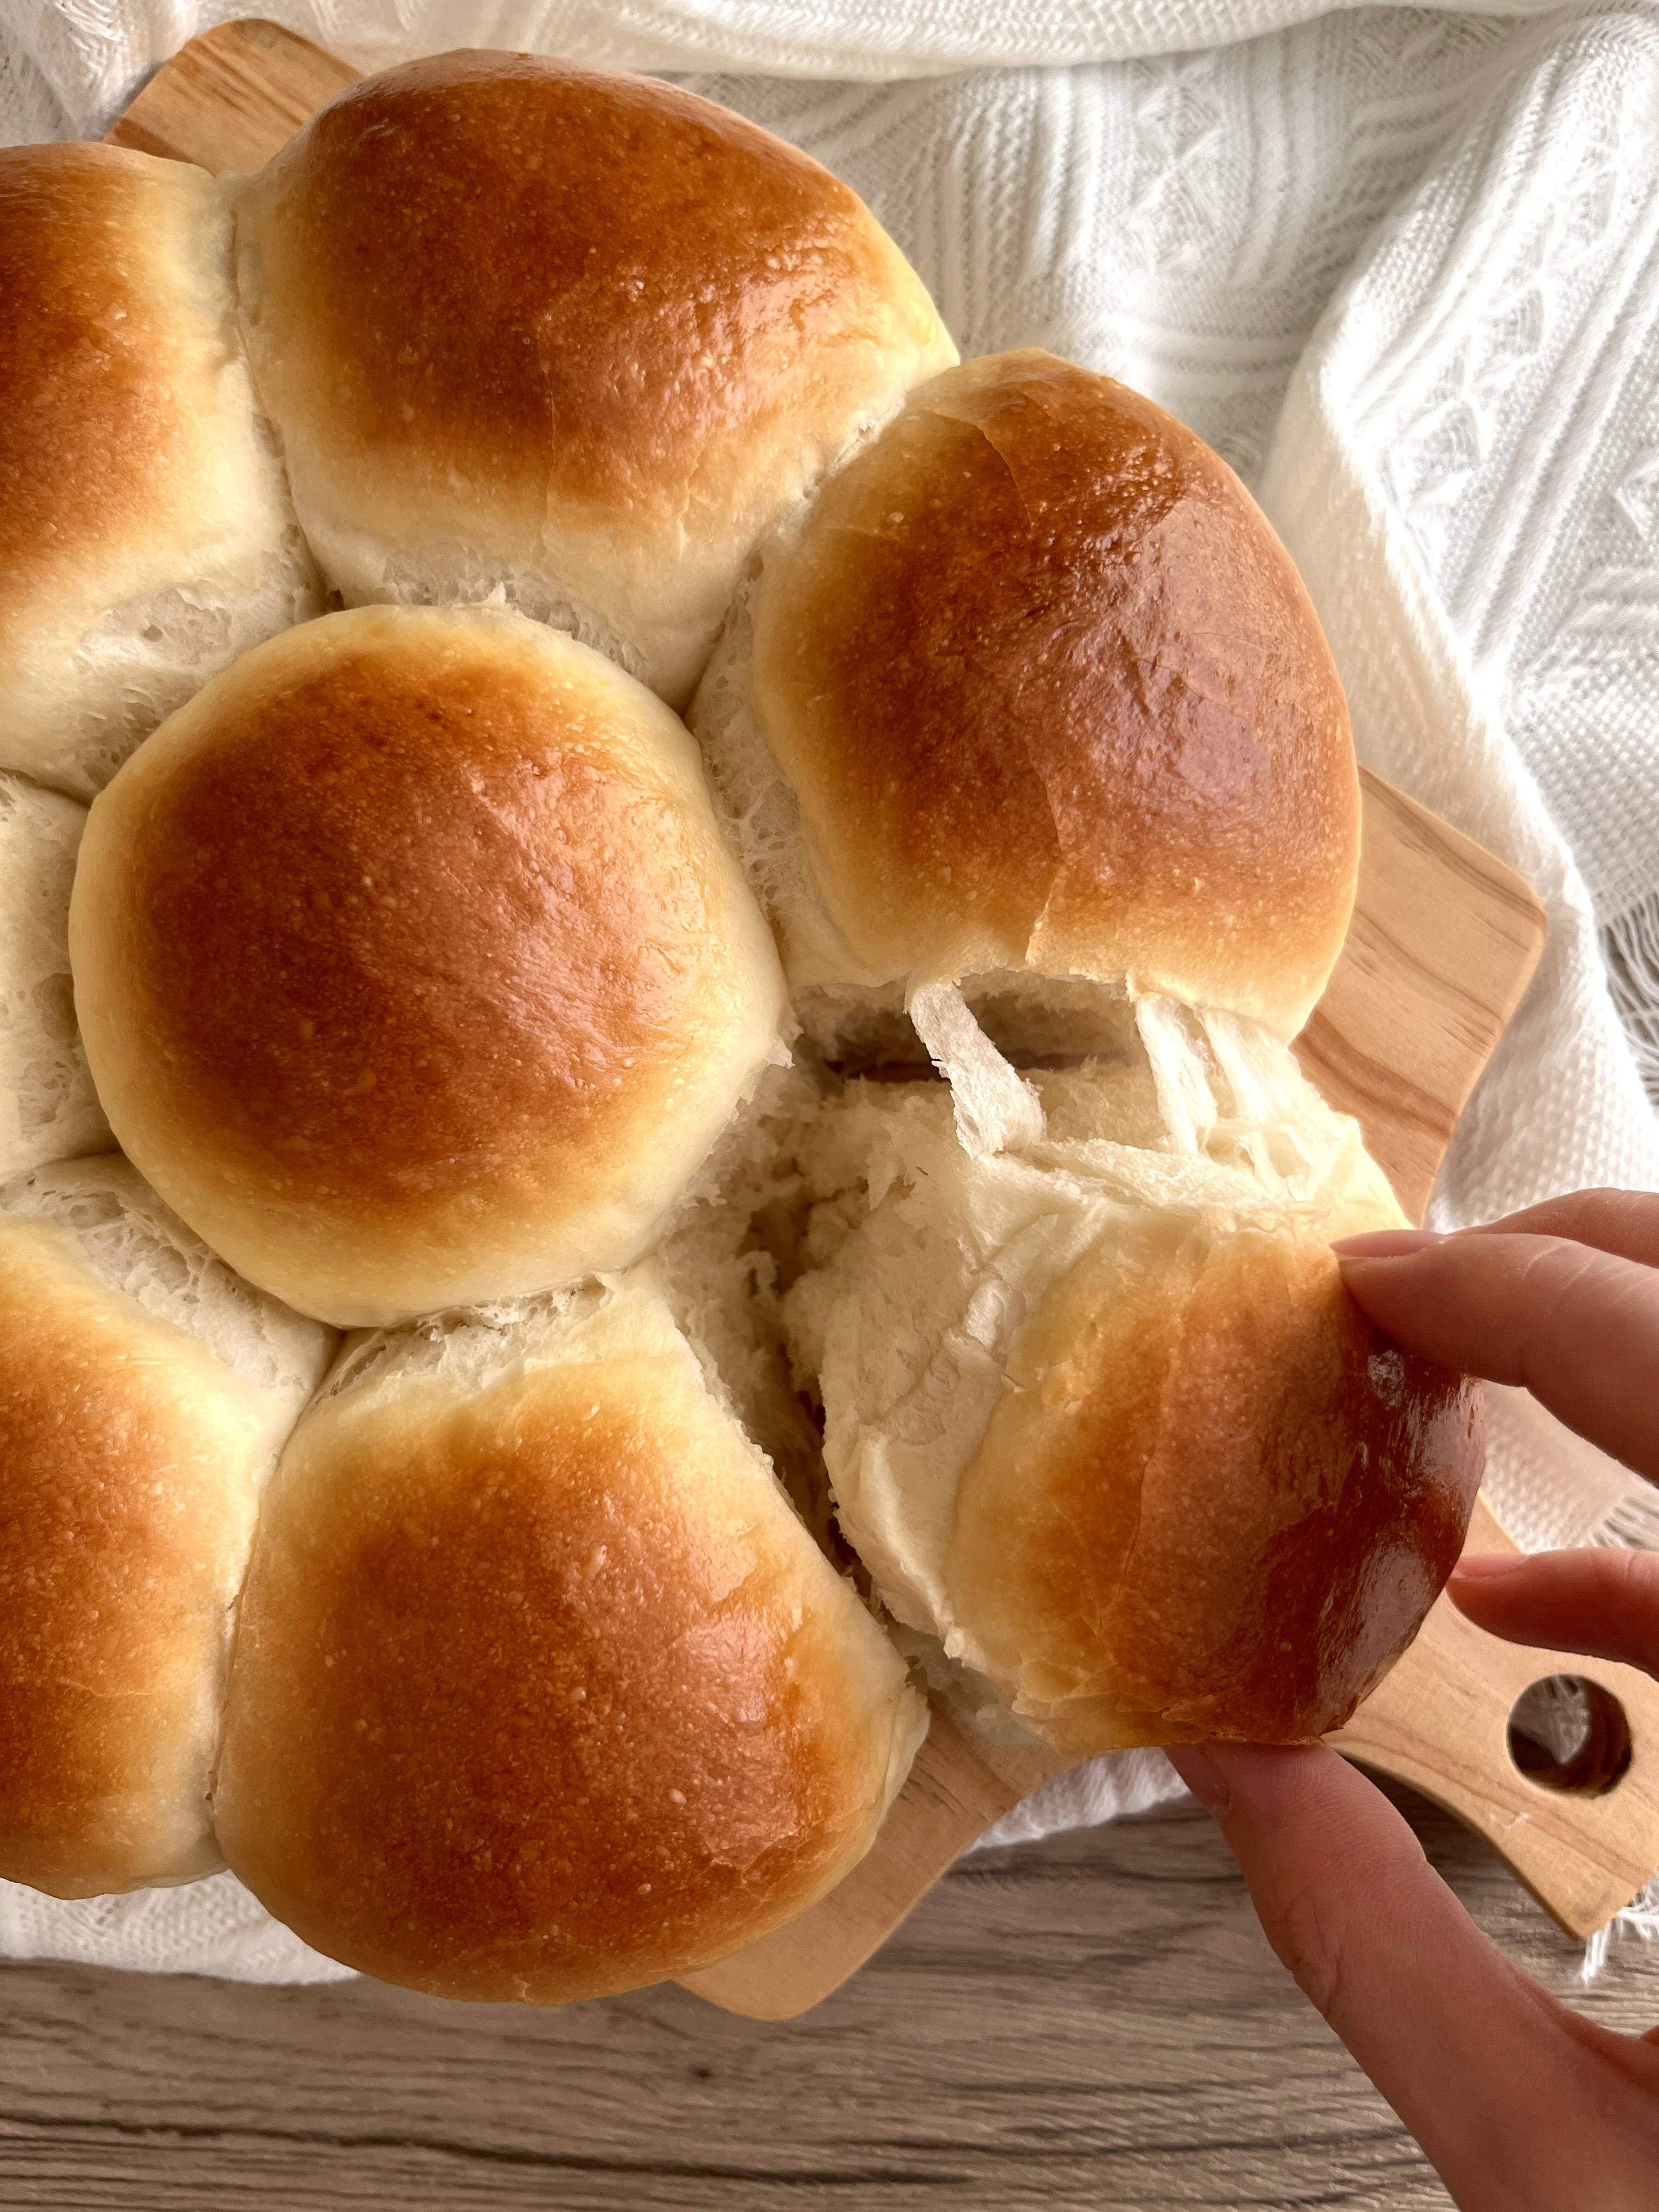
With a caramelised crispy crust, these milk buns have a spongy and chewy interior with a slightly sweet, milky, and buttery flavour that brings you to a simple path to pleasure. Enriched with butter, milk, and eggs, the buns have a pull-apart texture that makes them so irresistible!
These milk buns make me think of the sweet dinner rolls served in Italian restaurants in Hong Kong. I was very picky on food when I was a kid, especially on bread as I wasn’t a fan of bread, but I loved the softness and sweetness in these milk buns and enjoyed dipping them in a bowl of creamy corn soup. The soup’s creaminess infused with the soft buttery bun gives you a next-level deliciousness.
Using just 6 basic ingredients for breadmaking, make this easy milk buns recipe and bring them onto the dinner table to share the joy of homemade goodness with your family! You can also have them for breakfast or serve with a cup of coffee or milk tea during afternoon tea.
Table of contents
Ingredients for soft milk buns
- Bread flour: This produces baked goods with more structure and a chewy texture.
- Yeast: A leavening agent that allows the bread dough to rise with a light and airy texture.
- Salt: Not only does it give saltiness to the bread, salt also accentuates the flavours of all ingredients, and strengthens the dough.
- Sugar: Sugar activates the yeast, which causes the dough to puff up and contributes to the sweetness of the bread.
- Milk: This adds sweetness to the buns and creates a softer texture with a nice and crispy caramelised crust.
- Unsalted butter: This gives a buttery flavour to the bread and tenderises the bread dough to yield a soft and fluffy crumb.

How to make soft milk buns
- Combine all the ingredients in a mixer bowl, leaving the butter for later use.
- Using a dough hook, knead the dough in the kitchen machine for around 5 minutes.
- When the dough begins to form a ball, do a windowpane test (see how-to below).
- Add in butter, then continue kneading for 8-10 minutes. Do a windowpane test again (see how-to below).
- Shape the dough into a ball and proof it for 1 hour (or until it doubles in size).
- Pat the dough to release air bubbles.
- Divide into 8 equal pieces, then shape each piece into a ball and place them onto an 8-inch round cake pan.
- Proof for the second time until the dough balls double in size (about 45 minutes to 1 hour).
- Preheat the oven to 180°C.
- Gently apply egg wash on the dough surface and bake for 20-25 minutes.


Can I chill/freeze the dough for later use?
After dividing the dough in 8 pieces and shaping them into balls, you can chill them in the fridge and let them rise slowly for 10-12 hours. The next morning, simply apply egg wash and bake them as directed. Alternatively, after the first proof, you can freeze the dough for up to 4 weeks. After thawing at room temperature, shape the dough into 8 balls, proof for the second time, then bake as directed.
Can I use plant-based milk instead of milk?
You can substitute milk with plant-based milk to obtain more nutritional value and reduce the amount of sugar from fresh milk. Depending on what type of plant-based milk you use, be sure to check their nutritional label, as most plant-based milk contains more water content than fresh milk, so you should reduce the amount of plant-based milk accordingly. Note: the baked buns using plant-based milk will have a lighter brown, less caramelised crust due to the lower sugar content.

Success tips for making soft and fluffy milk buns
Make sure you knead the dough well.
Underkneading the dough will mean that it won’t rise properly as the dough lacks strength and elasticity to hold up the gases that allows it to inflate. It will turn out flat instead of puffed up, resulting in a dry and dense bun. An overkneaded dough will not rise properly either. The dough will become dense and tough rather than springy, resulting in a dry bread with a hard crust.
How to know if you’ve kneaded the dough well? Do windowpane tests during the kneading process. See details below.
Make sure the yeast is active.
Yeast is the key leavening agent that inflates the dough. It converts the sugar into carbon dioxide gas, which aerates the dough. It also absorbs the gases and hold onto them so that the dough will puff up.
If you’re not a frequent homebaker, you might have bought a pack of instant dry yeast and this recipe will only be using a small proportion of it. So what happens if the yeast has expired? You could still use expired yeast for up to 4-6 months beyond the expiration date, if stored properly. I normally store the yeast in the freezer after opening to make sure they stay dry, especially in the humid weather. However, to ensure expired yeast would still work, you can test it by stirring them in lukewarm water and wait for 5-10 minutes. If the mixture becomes bubbly, it means the yeast is still active.
Seal the bottom of the dough balls after shaping.
When dividing the dough and shaping it into 8 balls, make sure you pinch and seal the bottom to ensure they maintain in shape as they proof for the 2nd time.

What is a windowpane test and why should I do it?
A windowpane test is to verify whether the dough is strong and elastic enough to hold the bubbles as it rises and stretch even more when it is baked in the oven. If the dough doesn’t pass the test, it’s probably under-kneaded so some more kneading would do the work! You could also cover the dough with cling film and let it rest for 15-20 minutes to develop the gluten structure before performing another test.
How to do a windowpane test?
I normally perform the test twice during the kneading process before proofing the dough to ensure the gluten has been well developed. I do a test before adding in butter by pulling out a small piece and stretching it out gently. The dough should be smooth and elastic at this point, and as it tears apart, the holes should have rough edges.
For the second test (performed after kneading the dough with butter added), the dough should be more easily stretched out without breaking. You could use a finger to poke a hole and this time, the hole should be smooth without rough edges. This means the dough is ready to rise!


Just loook at this satisfying pull-apart stretch! With this easy milk buns recipe, I’m sure you’ll be amazed by the results and will worth your time and effort in making milk buns from scratch at home!
Other bread recipes


I’d love to hear about your experience making my recipes! If you’ve tried this Soft Milk Buns recipe or any other recipe on HomeCookJournal, then don’t forget to rate the recipe and leave a comment below. Feel free to take snapshots of your experience with my recipes and share them on Instagram so I can repost on stories! And if you have any other foods you’d like to make, please feel free to comment as well!

Soft Milk Buns
Equipment
- 1 Kitchen machine
- 1 Electronic scale
- 1 Dough scraper
- 1 Silicone baking mat chopping board works well too
- 1 8-inch round baking pan
Ingredients
- 280 g bread flour
- 25 g sugar
- 1 tsp instant dry yeast
- ½ tsp salt
- 180 ml milk
- 20 g unsalted butter softened at room temperature
For the egg wash
- 1 egg
- 1 tbsp water
Instructions
- Add in all the ingredients for the bread dough, except butter, into the kitchen machine mixer bowl.
- Using the dough hook, knead the ingredients on low speed to slowly mix them together. Gradually increase the speed level, and continue to knead until it begins to form a ball (about 5 minutes). Do a windowpane test (see Note 1).
- Add in butter, then continue kneading on medium-high speed for 8-10 minutes. Do another windowpane test to check if the dough is ready to rise (see Note 2).
- Take the dough out and shape it to a ball. Transfer it back to the mixer bowl and cover with cling film or a damped towel.
- Proof for 1 hour or until it doubles in size.
- After the 1st fermentation, take out the dough and pat to release air bubbles.
- Divide the dough into 8 equal pieces. Shape each piece into a ball, then place them onto an 8-inch round pan lined with baking paper.
- Proof for the 2nd time for about 1 hour or until the dough balls double in size.
- Preheat the oven to 180°C.
- Brush the dough balls with egg wash and bake for 20-25 minutes.
Notes
- Do a test before adding in butter by pulling out a small piece and stretching it out gently. The dough should be slightly smooth and elastic at this point, but tears apart easily. And as it tears apart, the holes should have rough edges.
- For the second test, the dough should be more easily stretched out without breaking. You could use a finger to poke a hole and this time, the hole should be smooth without rough edges. This means the dough is ready to rise!